
We have tried all different kinds of chick brooder boxes from a plastic tote to a kids swimming pool. The problem with all of those is the chicks seem to grow out of them really quickly and then you’re are left scrambling for a new option. It definitely doesn’t help to make your homestead more efficient. This DIY chick brooder will make it simple to raise all of your birds in one box with minimal work.
Below is how we have made our favorite brooder box yet. It’s a simple 2X2 build that can be completed in less than a day. Our most recent one was built on a very cold day in January next to a fire (that’s how we bribe our kids to go outside in the winter, haha). It is a pretty big box (4’x4′) so you need somewhere to place it, but in my opinion, anything is better than inside your house. Anyone who has brooded chicks in their house knows what I’m talking about.
Final Dimensions: 4’x4’x24″, top lifting door needs 4 foot clearance overhead, can hold approximately 50 chicks.
*Just an extra note: we use a Kreg pocket hole jig for all of our builds now, since we discovered this awesome tool our builds are sturdier, and actually easier to put together. The Kreg takes a little extra time to drill out the pocket holes but I promise it’s worth it, especially since most things on the homestead are being moved around a lot!
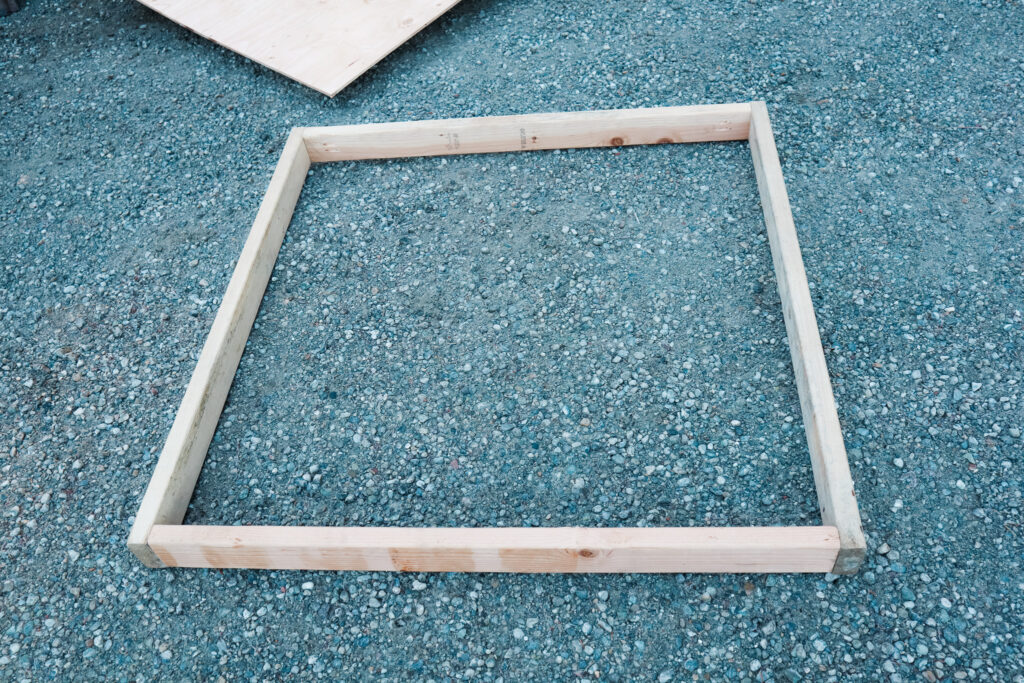
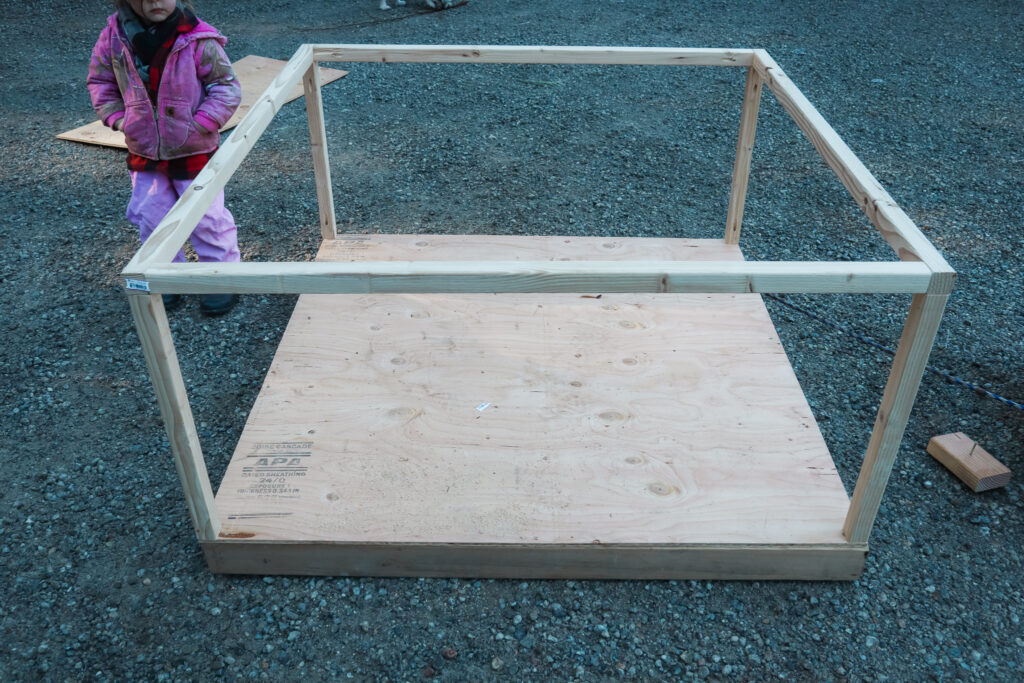
Build the bottom frame with 2″x4″x45″ and 2″x4″x48″ pieces.
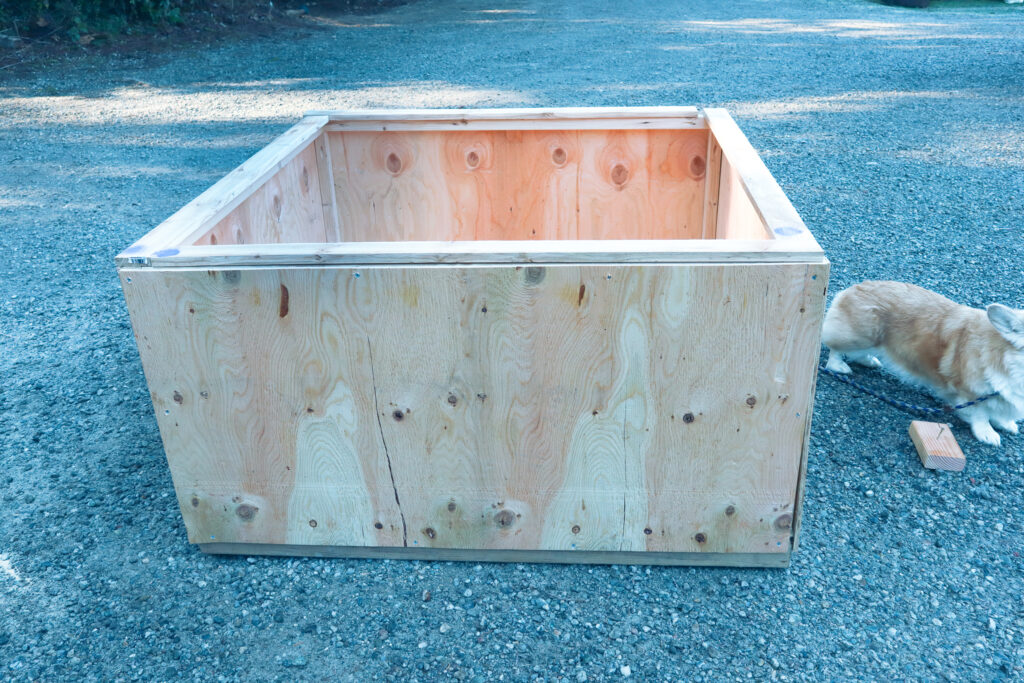
Attach the 4’x’4 piece of plywood to bottom frame.
Build 2″x2″x4′ frame and attach 20″ risers to the frame. Attach all to the base.
Attach 4’x24″ plywood sheets to outer box.
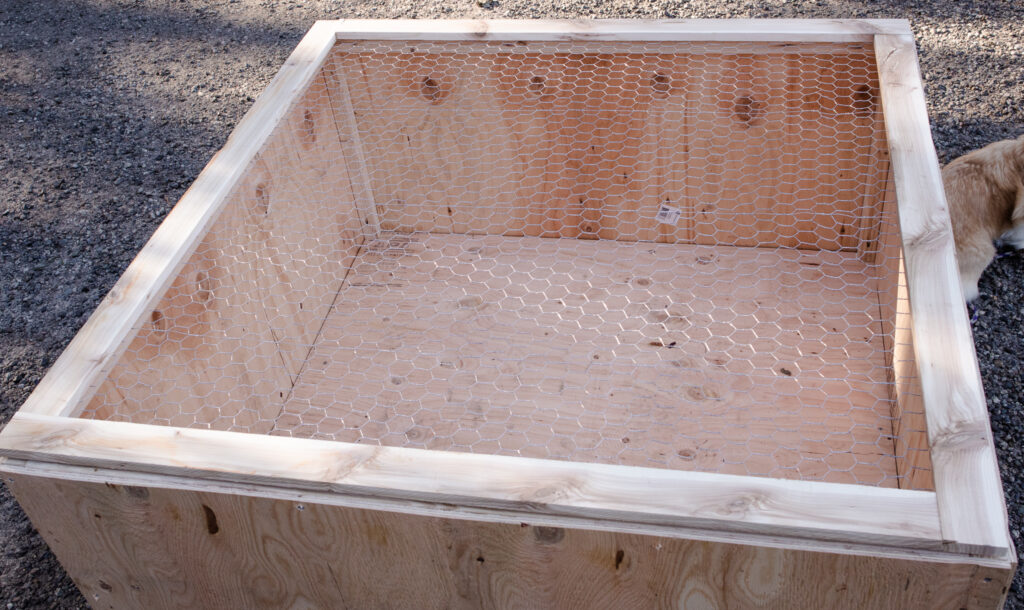
Build the door with 1’x3″x4′ pieces, do not attach the hinges yet!
Attach the flat corner braces to underside of door, then attach the chicken wire to underside of the door.
Attach the door to the main body with 2 hinges. You can attach a latch if you wish, we find the door is heavy enough to be left alone.
Now it’s complete! Fill with pine shavings or pellets and add chicks.
I hope you enjoy this simple DIY chick brooder. It really has worked great for us. We have even made it half the size for a smaller box, and we have increased its size so we can fit all 75 of our cornish cross meat chickens. If you are looking for tips on how to brood your new chicks check our best tips here.